
Sunday, May 8 – the first step for this summer’s cruise – we repositioned Flying Colours from Seattle’s Shilshole Marina to our slip at Anacortes Marina.
Winter work on Flying Colours was more extensive than we expected, taking longer and costing more than we budgeted . . . but after all, this is a boat.
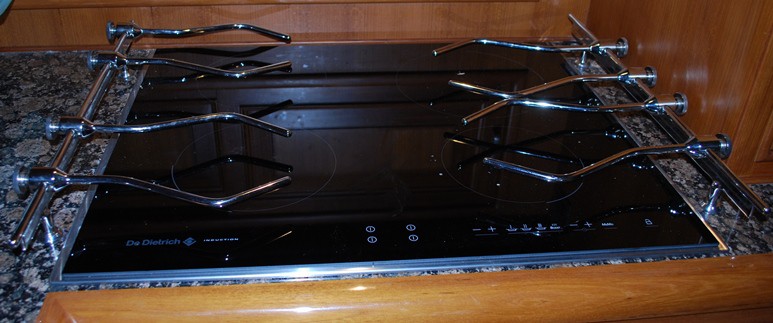
(click on any photo to enlarged view) The new De Dietrich induction cooktop ( a German brand I've never heard of before). If you’ve never cooked on an induction cooktop, it’s a very interesting new experience. Very popular in Europe, they haven’t yet caught on that much in the U.S., but I’m sure they will. An induction cooktop makes the pan containing your food the original generator of the cooking heat – there’s a good description of how this works at http://theinductionsite.com/how-induction-works.shtml , but here’s a good summary: “Put simply, an induction-cooker element (what on a gas stove would be called a "burner") is a powerful, high-frequency electromagnet, with the electromagnetism generated by sophisticated electronics in the "element" under the unit's ceramic surface. When a good-sized piece of magnetic material--such as, for example, a cast-iron skillet--is placed in the magnetic field that the element is generating, the field transfers ("induces") energy into that metal. That transferred energy causes the metal--the cooking vessel--to become hot. By controlling the strength of the electromagnetic field, we can control the amount of heat being generated in the cooking vessel--and we can change that amount instantaneously.” Sounds simple, huh? Well, it is, but it also requires all of your cooking pans to be ferrous (i.e., magnetic metal, not stainless steel), and you have to get used to the drastically reduced cooking times it results in.
First stop when we brought Flying Colours south from Anacortes last November 10th was at Pacific Yacht Management, just inside the Ballard Locks on the Lake Union Ship Canal, where we’d scheduled some warranty work with Jeff Sanson. We also decided to get new bottom paint, which would necessitate a haul-out at Seaview Boatyard just across the Ship Canal.
Besides the annual engine maintenance that we wanted Jeff to schedule with Cummins Diesel, we had a fairly long list of smaller items, including several that were warranty issues – a primary issue being to get the induction cooktop fixed. Half of the galley cooktop burners stopped working during the last month of our 2010 summer’s cruise. At first I figured it was some form of user error, but it was actually failed electronic circuitry in the unit. Jeff’s crew spent considerable time and effort trying to get the unit repaired, but being a Bosch (German) cooktop that was sourced by Fleming from the UK, replacement parts are not available in the U.S. That proved problematic. First we learned that we’d have to pay high shipping costs to airfreight replacement parts, and then without knowing exactly what the problem was, it would only make sense if we ordered up spares for everything that could possibly be wrong – only to find that returns were not allowed. In the end, Fleming opted to supply us with a new cooktop under warranty, with the admission that they’d had problems with this model and had switched suppliers since our boat was built – but we’d have to pay for any installation charges. As it turned out, the new cooktop is wider by a couple of inches, necessitating an expensive re-sizing of the drop-in hole in the galley’s granite countertop, plus drilling new holes for the fiddles (adjustable stainless steel rails that keep pots from sliding around if you’re cooking while underway – see photo). In the end, the job cost us $700+ out of pocket, but it appears to be worth it.
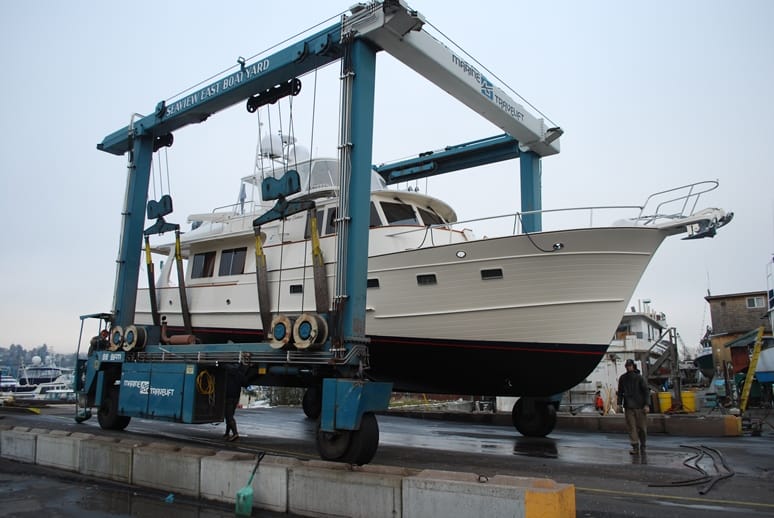
Kap and I just had to be there for the haul-out, seeing a 62’ long boat that weighs 70,000 lbs being lifted out of the water as if it’s a toy boat. This Travelift can handle boats up to 55 tons (110,000 lbs). The biggest concern was ensuring the lifting straps were positioned exactly correct, structurally for the hull itself, as well as to miss our stabilizer fins and any thru-hull tubes that might be sticking out.
The next shock came when Flying Colours was hauled out at Seaview Boatyard – and an ominous “bulge” was spotted in the hull. This was the first haul-out since she first went into the water in the summer of 2009, and since this bulge was below the waterline, we had no suspicion of its presence.
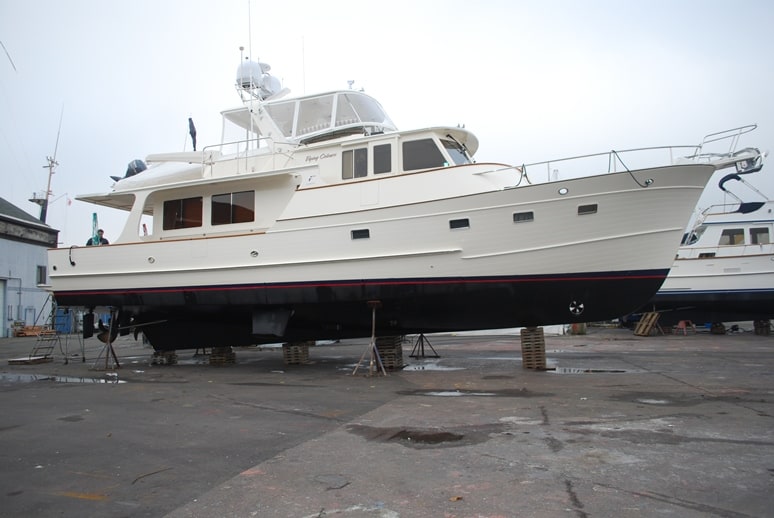
Once out of the water, Flying Colours is maneuvered to a “parking spot” – called “being on the hard” – supported by what looks like a half dozen flimsy stands and keel blocks that she’ll rest on during the work. A stairway is wheeled up to the stern, and workers can then go on board.
The bulge – or blister, or whatever it was – proved at first to be a mystery. Technicians at Seaview tapped on it with a ballpeen hammer to see if it had any hollow core – it didn’t. They used a moisture meter to see if there was any indication of water under the surface – if so, it would indicate a failure in the gel coat and fiberglass – but it came up absolutely dry. Finally, a query was sent to the Fleming factory – and that resolved it. During construction, a thru-hull had been drilled in that location, presumably to vent gray water from the washer/dryer located in the guest head directly above. After drilling, though, they had determined a better location for the thru-hull and made a factory repair to the original location.
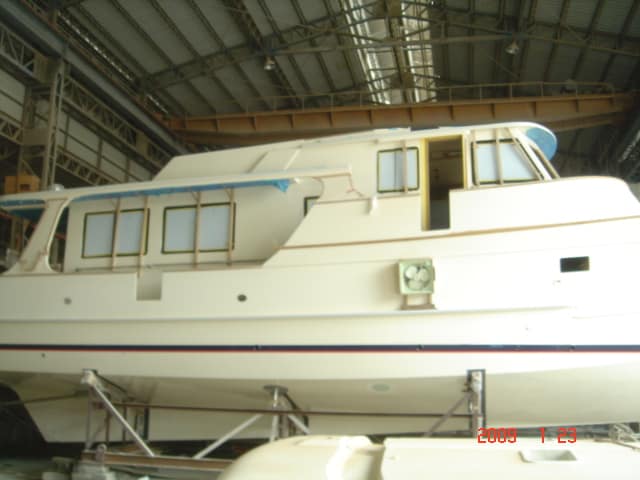
Here’s a photo that the Fleming factory sent to us, showing the thru-hull being repaired. You can see the repair patch a few feet below fan that's been temporarily positioned on the side of the hull. This photo is dated 1/29/2009, about two months before Flying Colours departed the factory in Kaohsiung, Taiwan, bound for Seattle.
At the time Flying Colours was delivered to us, and during the several months she was in the commissioning yard in 2009, this bulge hadn’t appeared. Sometime later – maybe due to the cold, or possibly water exposure during our cruises of 2009/2010, the bulge grew and was now noticeable. We were assured there wasn’t any structural integrity issue, but in any case, the factory agreed to have Seaview grind it out, and scarf in a new fiberglass surface to make it look like new (paid for under warranty). The bulge repair was done before the bottom repaint, and the next time we saw Flying Colours, she looked good as new.
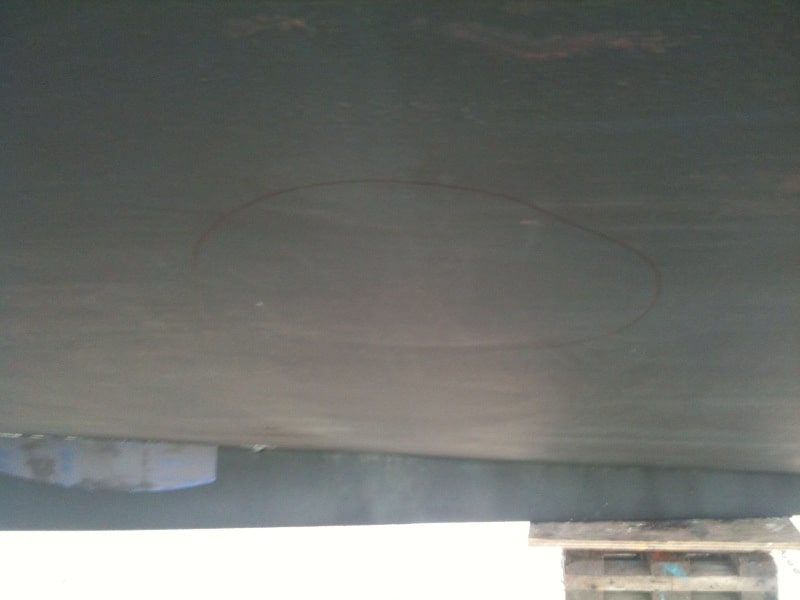
Here’s the “before” at Seaview showing the bulge. It was in the same exact location as on the factory photo sent to us. (You'll probably have to click on the photo, enlarging it, to see the bulge.)
While all this was going on, we talked over with Jeff Sanson about minor vibrations we felt while cruising at certain speeds with Flying Colours. One suspicion was possibly a damaged prop – we’d hit at least one floating log during our two years of cruising, and had possibly bent a prop blade. On visual inspection neither prop appeared damaged, but we could only find out for certain by precise balancing at a propeller shop. We authorized Jeff to remove both propellers and take them to Kruger and Sons Marine Propeller Specialists in Seattle to tune them on their CAD “pitchometer”. Sure enough, they found the leading edge of one prop bent. We also opted to have both props fine-tuned and balanced to Class I status. That bit of tune-up cost us $450/prop, but it too should be worth it.
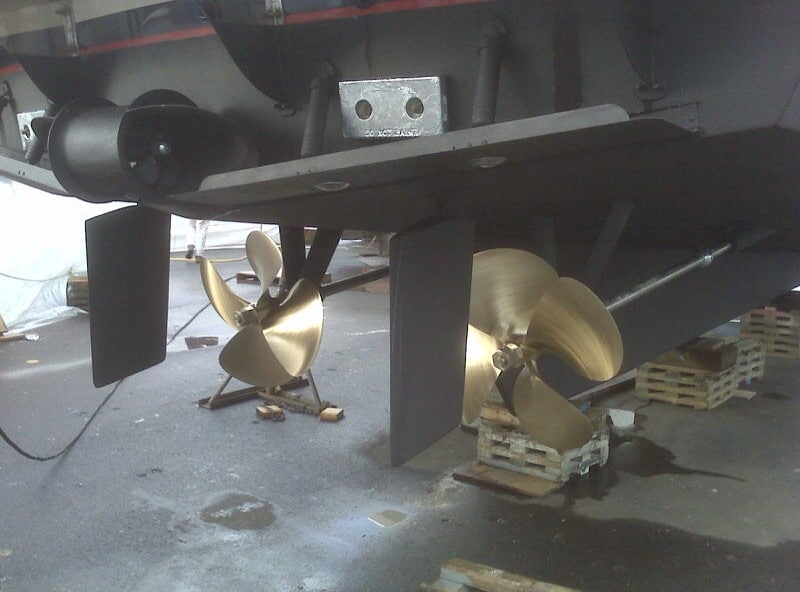
Propeller balancing is rated as Class III, II, I, and S. In simple layman terms, Class III is pretty scuzzy; Class II is pretty good; Class I is darn good; Class S is what the Navy does for submarine props, and is the ultimate. We opted for Class I, which should reduce any vibration we now have, plus give us a small improvement in fuel efficiency and top speed.
Lastly, once back at Pacific Yacht Management we asked Jeff to see what could be done to quiet our WhisperGen – the whizz-bang high-tech generator that we’d installed primarily as a main house-bank battery charger. It’s a marine Sterling diesel engine, and as you’d expect by its name, it should be quiet. Instead, when parked at a dock with the WhisperGen running, we could hear its exhaust at least 100’ away – and this isn’t acceptable at many marinas. We were really pleased that adding a second muffler did the trick, and now our WhisperGen is truly whisper quiet – but why wasn’t it that way in the first place?
Finally, in early January it was time to move Flying Colours over to Yacht Masters NW, a boatyard in Lake Union that we’ve selected for our final commissioning work – stuff that should have been done during the original commissioning, but wasn’t completed to our satisfaction due to time constraints. Our work list there was larger – at least 15 items that we felt would finally get Flying Colours truly into shape for the kind of cruising we do.
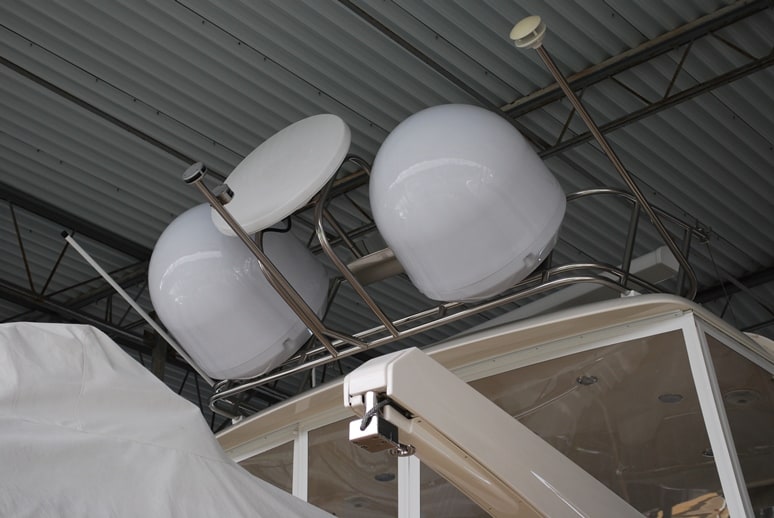
The new raising/lowering mechanism for the antenna arch is magnificent! In this photo, the arch is in the down position, resting on plastic saddles that Yacht Masters built and mounted on the hardtop to carry the weight of the arch.
The most important item was to re-work the antenna arch raising/lowering mechanism to be more automatic. This stainless steel tube arch sits atop our fly bridge hardtop and provides the mounting platform for our satellite TV dishes, the GPS satellite compass antenna (the saucer-shaped round gizmo in the center of the photo), our navigation GPS antenna, and our cell phone booster antenna. Clearance on our marina covered slip is exactly 20’, and the antennas on the arch won’t clear it, so we had to have the arch built with a hinged mechanism – with an electrical winch motor mounted on the arch that drives steel cables routed inside the tubing (the arch and all the stuff on it weighs over 150 lbs, so doing this by hand isn’t feasible). The trouble was, when in the raised position, the arch needed to be bolted securely to the hardtop roof, and the original design used four 8” long bolts that I’d have to screw in and out every time we entered/exited our slip. In rolling seas this proved to be a real problem, and we needed a new design.
The new design uses a series of proximity switches and electronically-activated sliding bolts to lock/unlock the arch, and with a handheld remote control we can now raise, lower, and lock/unlock the arch with the push of a button – and the whole operation takes about 30 seconds. Our Project Manager at Yacht Masters NW, Bill Schmid, did an outstanding job in designing and implementing this.
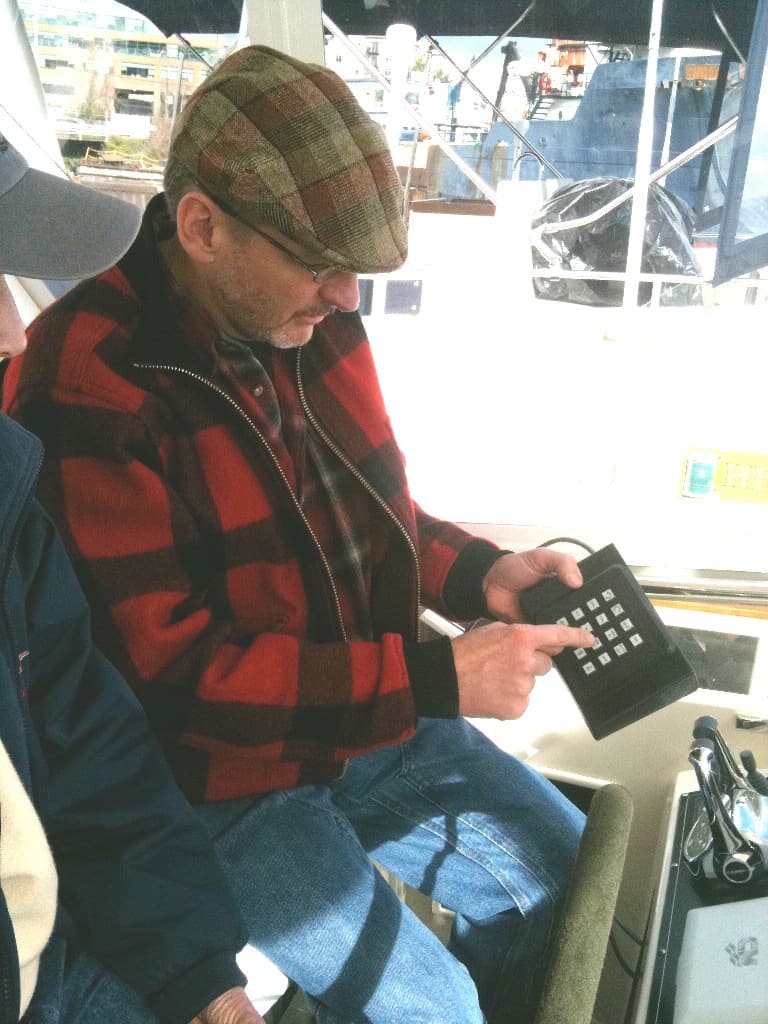
Brent demonstrates how to use one of his two innovative hot button keypads that he installed in the fly bridge.
In two seasons of cruising, we’ve used the fly bridge very little, due to instrument problems that weren’t worked out during commissioning. We asked our marine electronics wizard, Brent Woodward, to do whatever was necessary to get this resolved. Through a lot of head-scratching and brainstorming, Brent created (among other things) two keypads – with 16 hot buttons each – to drive our most frequent commands for the Furuno and Nobeltec navigation systems. He also simplified how the control stations are switched from the pilot house to fly bridge. We hope we’ll be able to cruise from the fly bridge a lot more in 2011.
Our project manager, Bill, also designed and built a mounting bracket for our second Hobe pedal kayak, sitting outboard of the first kayak on the dinghy deck. We’ve been putting up with this kayak lashed down to the deck under the dinghy, and it was always a headache.
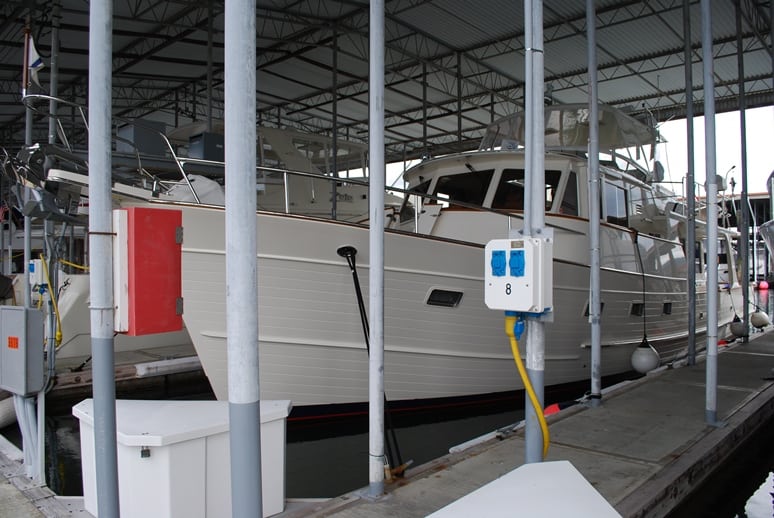
Along the way, and quite by accident (a better way to put it is that he’s very thorough) Bill noticed that our 50A shore power cord was incorrectly wired – giving us only 125V of current when we’re plugged into a 250V dock shore power pedestal. In the event we get lesser power, we have on board Flying Colours a sophisticated power management gizmo box in the engine room that steps up 125V power – and in so doing reduces your available amperage to 30A – and therefore we’d never noticed this to be a problem. Turns out, this mistake in wiring the shore power cord was evidently done at the Fleming factory, and after sending photos they concurred (but didn’t offer to pay for rewiring the plug). No one will admit it, but I’m certain this under-power situation has been the culprit in many of our electrical problems – blown rope lights throughout the boat, 110A electrical outlets that blow their fuses, two navigation screens that went on the fritz, the burned-out half of the induction cooktop (which takes a lot of electricity to run). At this point, we’re not making any noises, but I think we’ll have far fewer electrical problems in future.
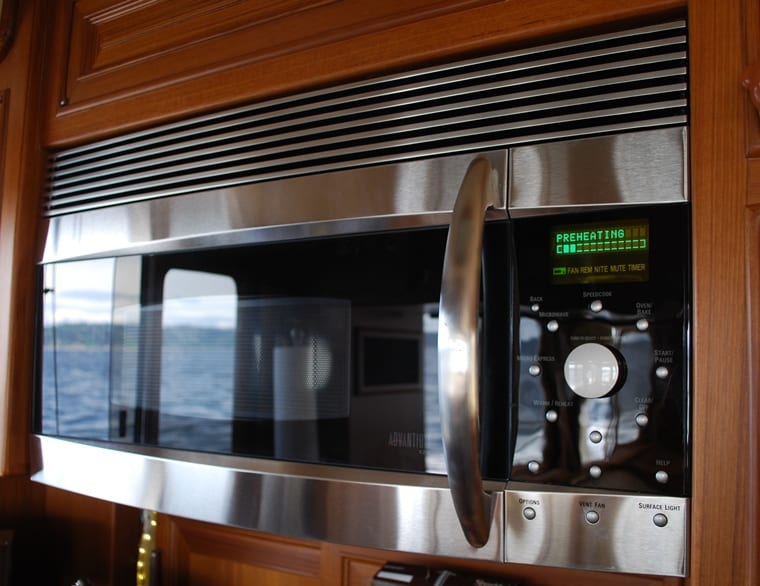
Our new super-duper convection/microwave oven – a GE Advantium model that proved it could really put out the power when I fixed lunch for us on the cruise north to Anacortes. I think I’m going to have a really good time cooking with this on our summer cruise.
Another niggling problem from our 2010 cruising was our convection oven/microwave in the galley. It was a super-duper model, but the convection oven side of it just didn’t seem to be able to generate enough heat for what I needed – plus I never could get the broiler to work (I’m now convinced this was another power problem stemming from the improperly wired power cord, but by the time I figured this out, we’d already made the decision to replace it). In talking to a friend who has a newer Fleming 55, they’re now putting in new generation GE Advantium microwaves. I instructed Bill swap ours out for a new one.
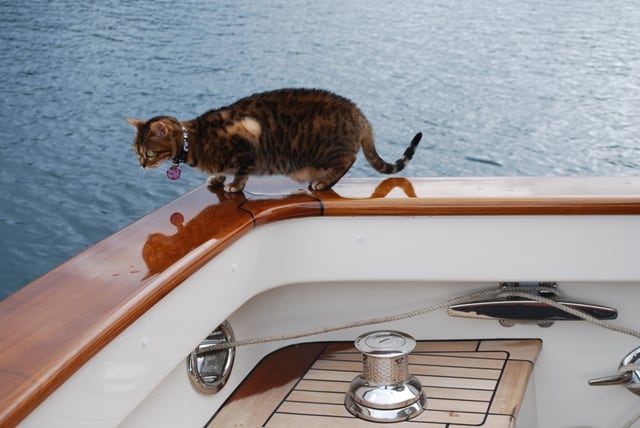
ZuZu is making her rounds on the flawless varnished teak cap rails.
Lastly, Flying Colours went across Lake Union to a yard called Level Sky Brightwork where all of the exterior teak rails were sanded and additional coats of varnish were applied. Thomas Forsythe (who owns Level Sky) does absolutely fabulous varnish work. This is an annual job that turns many power boaters against having any exterior teak on their boat – with the result that many power boats are just boring fiberglass bathtubs.
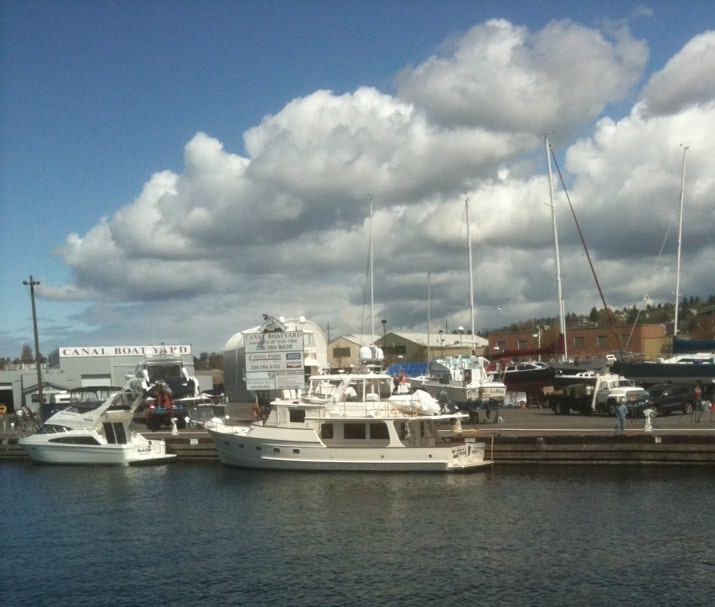
Flying Colours sits at the dock at Canal Boatyard having some last-minute fiberglass touch-up completed before being turned over to us after the long winter's work. This photo (by Peter Schaefer, our friend and broker at Chuck Hovey Yacht Sales) was sent to me in a text message from his cell phone when he passed by ferrying another boat through the Ship Canal.
On Thursday, May 4th, we boarded Flying Colours for the planned short trip through the Ballard Locks (officially they’re the Hiram S. Chittenden Locks, built and operated by the U.S. Army Corps of Engineers). It was just before the Opening Day of Boating weekend, and the locks were running busy, particularly inbound, and our wait was almost two hours. When we finally went through just after 5PM, there were only two boats in the locks going our direction.
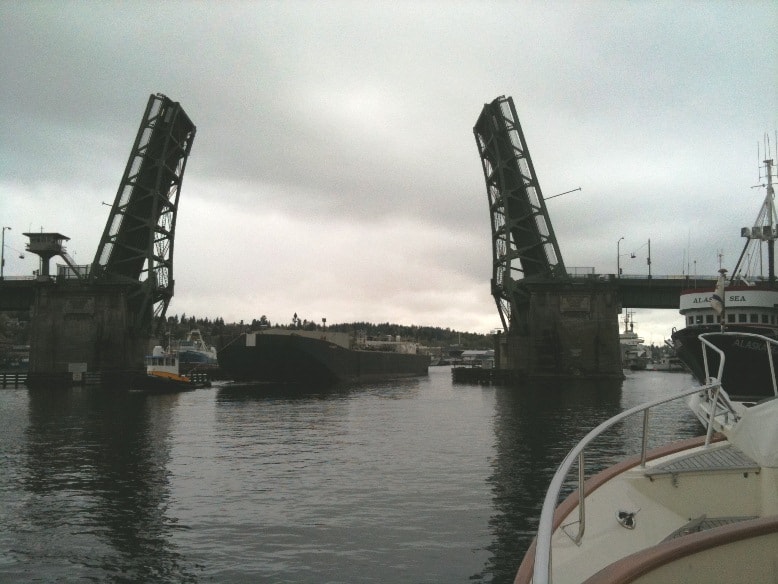
The Ship Canal connecting Puget Sound with Lake Union and Lake Washington has two low bridges. This one, the Ballard Bridge, is close to the Locks, and while it’s quite wide, it isn’t wide enough for a tug towing a very large gravel barge and Flying Colours at one time. We opted to wait and let him pass. The tug is a blue/yellow local tug from Western Towboat, the same company who took us to SE Alaska in 2003 and 2005 towing a 400’ container barge. The “big” lock that we were heading for is big enough for this behemoth, plus several other boats of our size.
Our plan was to moor overnight at Shilshole Marina, then depart early on Friday morning for the cruise to Anacortes. Several things – particularly instrument problems and weather – conspired against us, and we delayed our departure until Sunday morning.
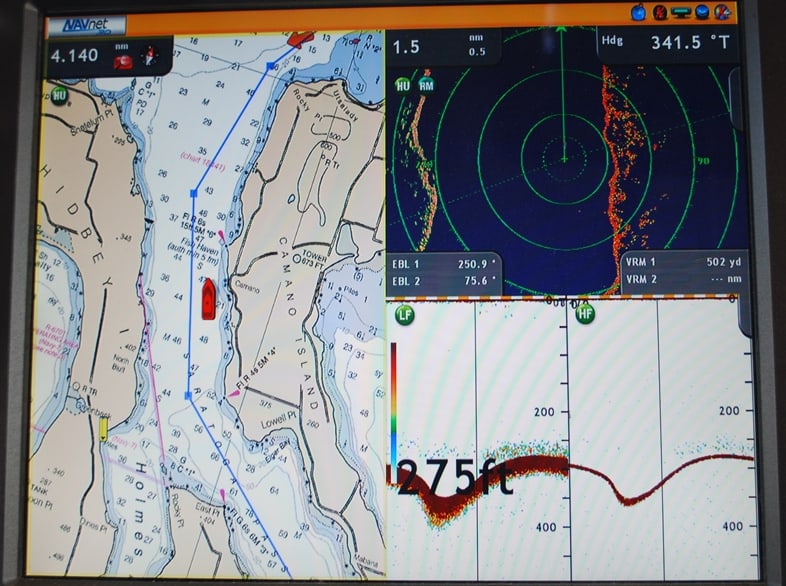
Our Furuno navigation split screens showing our route on Saratoga Passage, between Camano Island on our starboard side and Whidbey Island on our port. (You'll definitely have to click on the photo to enlarge it to see this.) The blue line is our course line that Kap plotted, and the red boat symbol represents Flying Colours heading north. At upper right is our radar screen, and we’re at the center of the innermost circle – the ragged vertical line to the right is the shoreline of Camano Island, and the innermost circle indicates that we’re .5 mile offshore; the orange-ish line on the left is the shoreline of Whidbey Island, and three circles out means that we’re 1.5 miles from it; there are no “bogeys” – i.e., other boats – around us, as no radar blips show up in front or behind us. At lower left is our depth sounder, indicating that we’re in 275’ of water – which almost exactly matches our navigation chart, as the number 47 at our bow on the navigation plot is equal to 282’ (a fathom is 6’, so 47 times 6 = 282’).
As usual, our route was up the inside of Whidbey Island – and being the fourth longest island in the continental U.S., it would be on our port side for over half of the entire trip. This time, we decided to go through Deception Pass, exiting onto the outside (west) of Fidalgo Island that Anacortes sits on – rather than through the slower (and more boring) Swinomish Channel past La Conner.
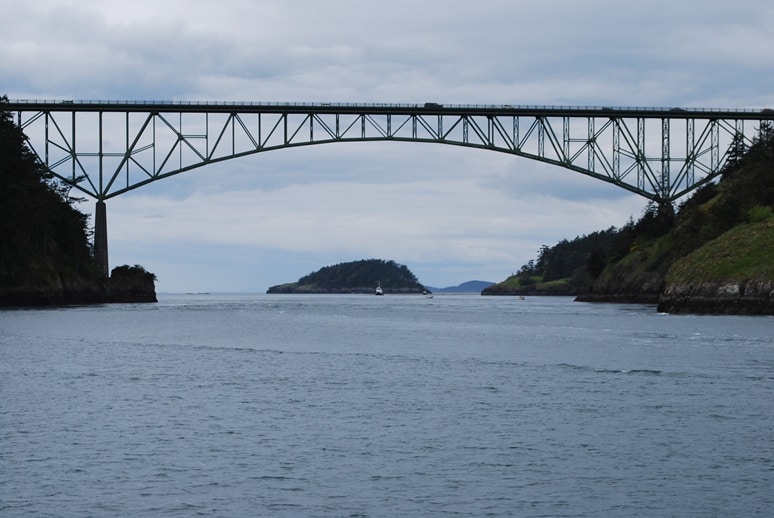
Approach to Deception Pass from the south. The bridge carries a 2-lane highway that connects Fidalgo Island (on the right in the photo) with the northern tip of Whidbey Island (on the left). The bridge is 976’ long, and is 180’ from water level to the roadway, depending on water surface below due to the tide. In front of the island in the middle of the bridge span, you can see the lead tug towing the log boom. Kap spotted him just about the time I took this photo, and it looked as if he would be a serious factor for us if we met in the pass.
Deception Pass can only be transited during “slack water” time – i.e., between the incoming and outgoing tides, when the water hasn’t yet started to move in the new direction of travel. It’s a narrow pass, resulting in a swift current that is very dangerous if transit is attempted even a bit before or after slack – maximum current runs 9-10 knots, and there are violently swirling whirlpools that can capsize a boat. As any good captain should, Kap timed our arrival for just after 1PM when our tide book indicated slack water.
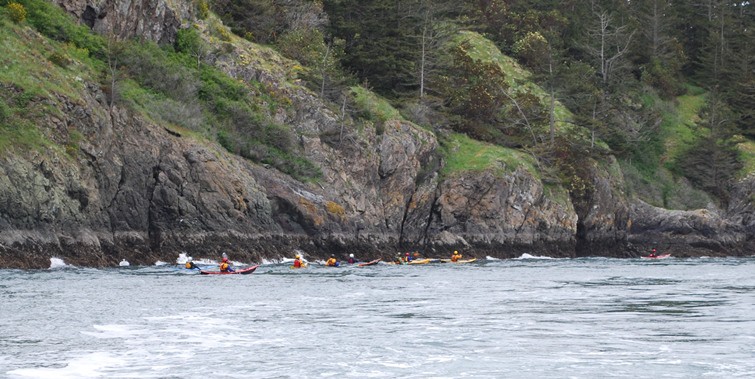
As we drove through the pass to the north, we spotted a large group of kayakers heading south, intelligently keeping close to shore and out of harm's way, as there’s almost a continuous stream of boats coming through the narrow pass during slack.
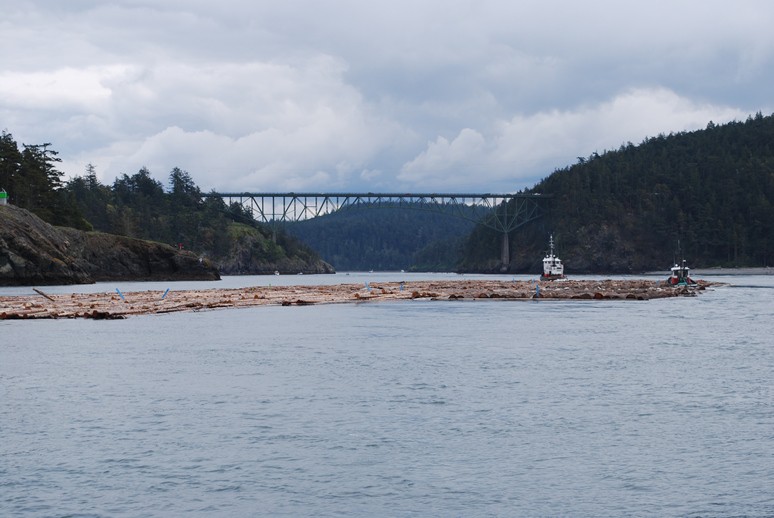
Halfway through Deception Pass, Kap spotted a tug towing a log boom and heading south towards the pass (actually, it was two tugs, one towing, and the other steering from the side). They didn’t announce their arrival on the radio – which they should, as it’s the last thing you’d want to meet unexpectedly as you’re going through. Luckily for us, we were on the north side of the pass before they entered.
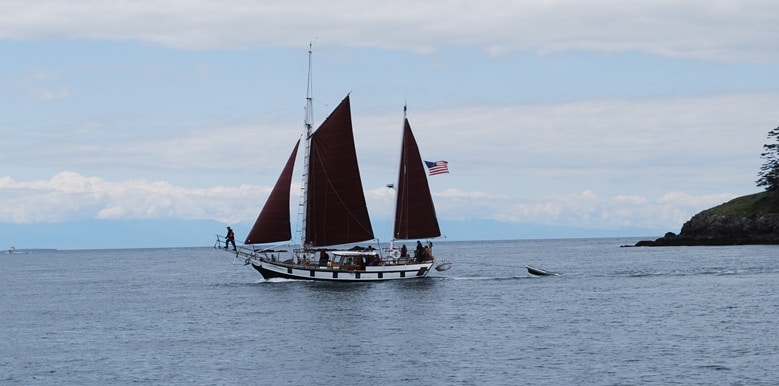
Around Anacortes there’s always lots of boating traffic to watch out for - sailboats in particular, because one never knows which way they’re going to turn if under sail. This interesting old schooner (I believe) had full sails up, but was actually using his engine – which we jokingly refer to as his “iron Genoa”.
Once through Deception Pass, it’s fairly quick to pass along the west side of Fidalgo Island, then turning east into Guemes Channel to come around the top side of Anacortes.
On the trip from Seattle’s Shilshole Marina to Anacortes there are three major ferry traffic routes to pass through. The first is the Edmonds-Kingston ferry that connects the Seattle suburb of Edmonds with the small town of Kingston on the Kitsap Peninsula. I was at the helm when we approached this, and ahead of me about a mile I could see both westbound and eastbound ferries meeting in center channel – a reassuring sign that they’d be at the ferry docks loading/unloading cars when we’d pass by.
The second is the Mukilteo-Clinton ferry that connects Everett to the south end of Whidbey Island. Kap was at the helm, and monitoring the Vessel Traffic frequency (Vessel Traffic is equivalent to air traffic control, but for the shipping lanes in Puget Sound), she heard just as she approached the ferry traffic lane that it was departing Mukilteo. Moving at 20+ knots (23 mph), they can be in mid-channel very quickly, so she opted to slow to a crawl to let it pass in front of us. Ferries have right-of-way within the marked ferry lanes on our navigation charts, so it’s fairly easy to see the general area where they’re going to cross – but knowing exactly where isn’t quite that easy. Each ferry scribes a wide arc in its route, providing maximum separation between the two ferries (maybe as much as a mile) as they pass in mid-channel – that arc makes it very difficult to see where they’re actually going to pass in front of us.
The third is the Anacortes-Friday Harbor ferry, connecting the mainland with the San Juan Islands. As you enter Guemes Channel (separating Fidalgo Island and Guemes Island), it’s sort of a blind corner, and the ferry terminal sits tucked in a protected bay that isn’t visible. Kap was at the helm, I was taking a short nap on the pilot house settee, and she woke me to ask if I knew how the ferries departed Anacortes. She had just heard the captain’s bridge of the ferry Elwha report departure from Anacortes, and right after that she saw it emerge from around the tip of the bay, heading into Guemes Channel. Before I could answer her question, we heard the captain of the Elwha on the radio talking to the ferry Yakima – “Yakima, if it’s OK with you, I’m going to make a hard left turn to go behind a private yacht, and then I’ll plan to pass you starboard-to-starboard. Is that OK with you?”
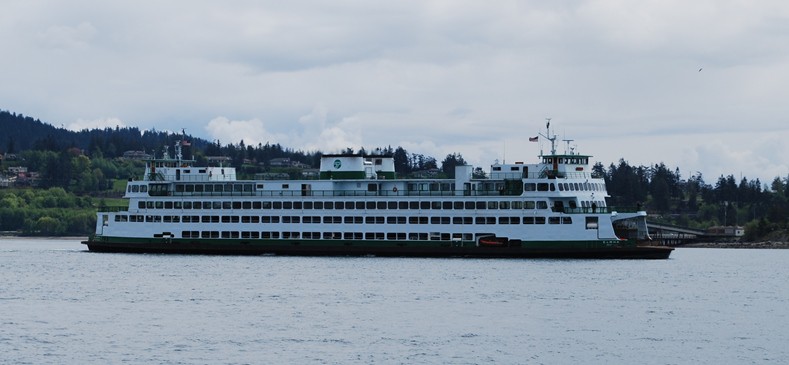
More hazardous are Washington State Ferries. This is the Elwha, a Super Class ferry that’s 382’ long, 73’ wide, carries up to 144 vehicles and 1,076 passengers, and cruises at 20 knots. (Elwha means “elk” in Native American/Chinook language.) It had just made a hard left to avoid us after coming into view from the hidden bay where the ferry terminal is located. We’re passing starboard-to-starboard.
Obviously, he was talking about us, and without saying anything directly to us he altered his course to go behind us – when in fact, he had the right-of-way to just continue towards our bow, making us slow drastically down and alter course from him. We didn’t say anything, and silently thanked him. As he passed, I opened the pilot house door to snap a photo.
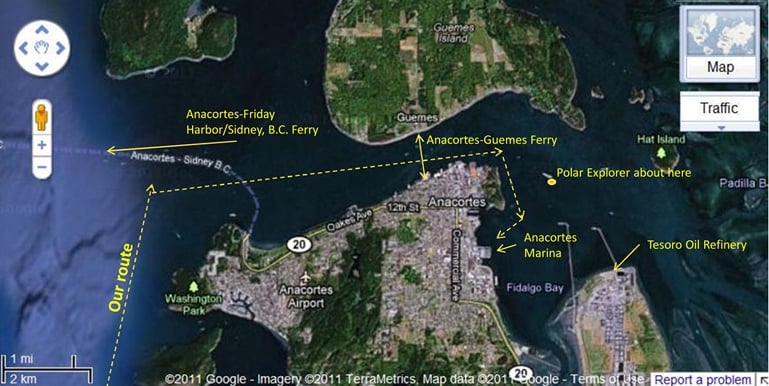
This Google Maps view shows the route through Guemes Channel from the west, past Anacortes downtown, super tankers in Padilla Bay waiting to unload at the refinery, and into Anacortes Marina.
Oh, I forgot the final ferry crossing that we have to contend with – the Guemes-Anacortes Ferry that runs from downtown Anacortes across to Guemes Island. The Mystic Sea has its own ferry terminal, operated by the Skagit County Public Works Department, and departs from the foot of I Avenue in downtown Anacortes for the 10 minute crossing to Guemes Island. The route is a straight line, but the ferry pops out of the terminal very quickly on either side, and if you’re not carefully watching for it in the fairly narrow channel, you’ll be on a collision course with it very fast. Unknown to us, the ferry wasn’t operating at the time we passed through, as the ferry terminals on both sides are undergoing upgrades.
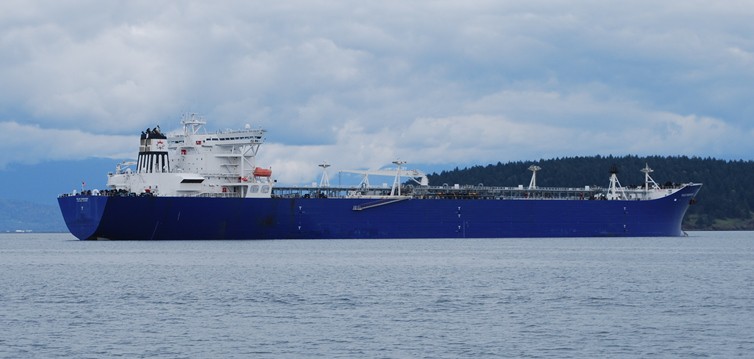
The Polar Endeavor was anchored in Padilla Bay as we passed, about ¼ mile offshore from the Tesoro Refinery at Anacortes. This massive oil tanker is 895’ long, 156’ wide, and carries just over 1M barrels of oil (that’s42 million gallons) from Alaska oil fields (departing from Valdez, AK). Built by Northrop Grumman Ship Systems in Mississippi, the ships are owned by a subsidiary of Phillips Petroleum Company. There’s a good photo of the ship’s deck – you can see what it takes to hold 42 million gallons of oil – at http://www.shipspotting.com/gallery/photo.php?lid=104526.
The last “big boat” hazard that must be watched for during the passage through Guemes Channel is huge oil tankers. There are always 2-3 tankers anchored in Padilla Bay, and we pass by them fairly closely (but are required by Coast Guard regulation to stay at least 500’ from them) regardless of whether we come through the Swinomish Channel or around the outside through Deception Pass. On the passage through Guemes Channel they are escorted by tug boats and have a pilot on board to ensure safety.
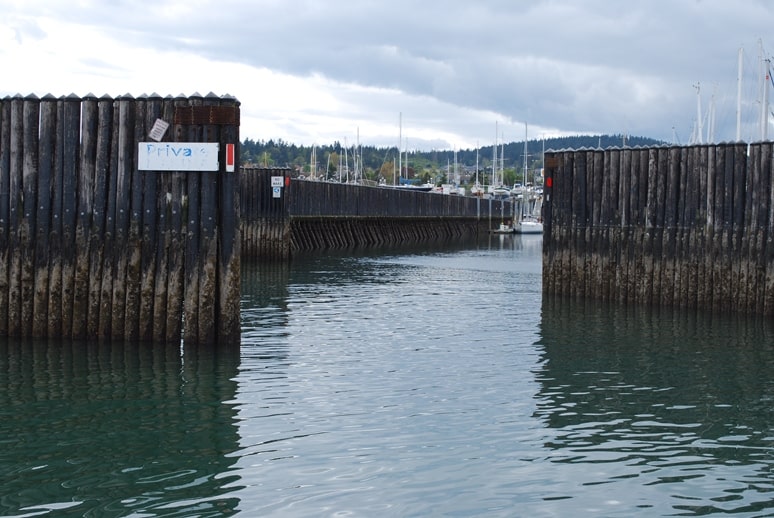
The entrance to Anacortes Marina is our next-to-last hazard – negotiating the S-turn pilings that block waves. For a boat the size of Flying Colours, it’s a very tight set of turns getting in here and Kap is becoming a master at it.
Finally, after a seven hour cruise we entered Anacortes Marina. It took us a further two hours to get Flying Colours settled in, and the lines all set up.
After a long winter at Lake Union, being exposed to the winter storms, she’s really in need of a good washing, waxing, teak deck cleaning, and interior cleaning. After that, we’ll need a week or so to get her all set up for cruising, including all of our provisioning.
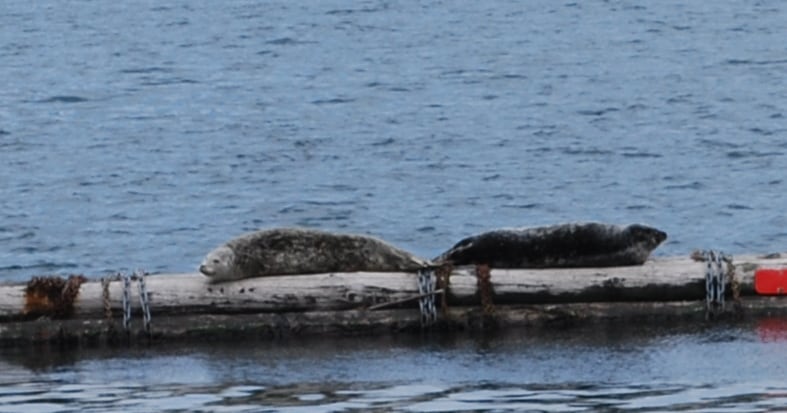
At the turn down our fairway to A-dock, two cute-looking seals were sunning on a floating piling.
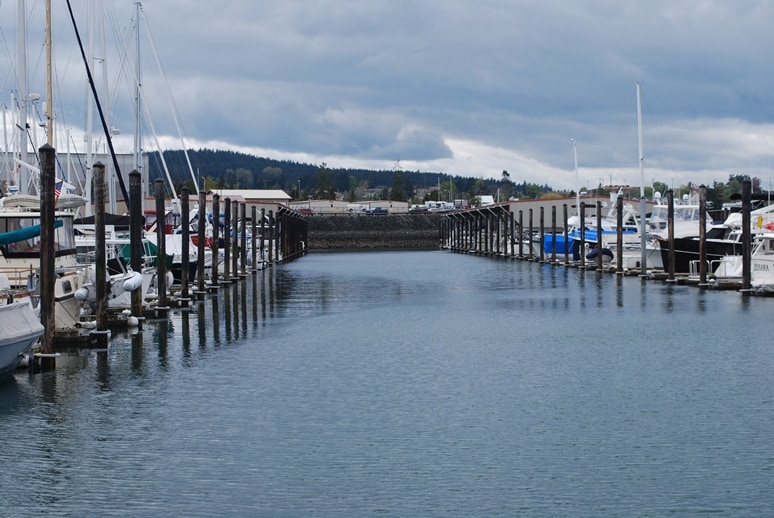
This photo shows the fairway between A-dock (on the right) and B-dock. We're on A-dock, at the far end closest to shore where there are covered roofs over the slips.
If all goes well, we hope to head out for our 2011 cruise on May 24. This year we expect to stay within range of Kenmore Air to get us home as necessary. With all new prawning gear, we hope to concentrate on loading up the freezer with lots of the little critters for a wonderful Flying Colours Scampi recipe that I’ve perfected.
It was good to have “water under our butts” for the first time since last November.
At 2:55PM, Kap expertly turned us into our slip, and Flying Colours is once again home.
That’s all for now – this first post of 2011.
Ron